i want to made container with two different opacity to make the screen more focus on some image, i used stack and container, is it possible to make something like this?
Here is my code example,
Stack(
children: <Widget>[
Image(),
Container(
height: double.infinity,
width: double.infinity,
color: Colors.black.withOpacity(0.4),
),
Thanks before guys,
I am not sure this is good solution. It will do the trick.
import 'package:flutter/material.dart';
void main() => runApp(MaterialApp(home: FirstPage()));
class FirstPage extends StatelessWidget {
#override
Widget build(BuildContext context) {
return Scaffold(
appBar: AppBar(title: Text("Demo")),
body: Stack(
fit: StackFit.expand,
children: <Widget>[
Image.network(
"https://images.pexels.com/photos/414612/pexels-photo-414612.jpeg",
fit: BoxFit.cover,
),
CustomPaint(
painter: MyPainter(),
)
],
),
);
}
}
class MyPainter extends CustomPainter {
final Color color;
final double opacity;
///ratio of max(height, width)
final double radius;
MyPainter({
Color color,
double radius = 0.3,
this.opacity = 0.4,
}) : assert(opacity != null && opacity >= 0.0 && opacity <= 1.0),
color = color ?? Colors.black,
radius = radius ?? 0.3;
#override
void paint(Canvas canvas, Size size) {
var rect = Offset.zero & size;
var gradient = RadialGradient(
center: Alignment.center,
radius: radius,
colors: [const Color(0x0000000), color.withOpacity(opacity)],
stops: [1.0, 1.0],
);
canvas.drawRect(
rect,
Paint()..shader = gradient.createShader(rect),
);
}
#override
bool shouldRepaint(CustomPainter oldDelegate) {
return false;
}
}
Related
I have the below code and I would like to add a floatingactionbutton to turn on and off the camera flash. I tried different ways but was not able to do it. Any suggestions would help. I tired different packages like torch, torch-light etc and it didn't work I think is because I have already called the camera package
import 'package:camera/camera.dart';
import 'package:flutter/material.dart';
class CameraScreen extends StatefulWidget {
CameraScreen({Key key, #required this.controller}) : super(key: key);
final CameraController controller;
#override
_CameraScreenState createState() => _CameraScreenState();
}
class _CameraScreenState extends State<CameraScreen> {
#override
#override
Widget build(BuildContext context) {
final size = MediaQuery.of(context).size.width;
return Container(
child: ShaderMask(
shaderCallback: (rect) {
return LinearGradient(
begin: Alignment.topCenter,
end: Alignment.center,
colors: [Colors.black, Colors.transparent])
.createShader(Rect.fromLTRB(0, 0, rect.width, rect.height / 4));
},
blendMode: BlendMode.darken,
child: Transform.scale(
scale: 1.0,
child: AspectRatio(
aspectRatio: MediaQuery.of(context).size.aspectRatio,
child: OverflowBox(
alignment: Alignment.center,
child: FittedBox(
fit: BoxFit.fitHeight,
child: Container(
width: size,
height: size / widget.controller.value.aspectRatio,
child: Stack(
children: <Widget>[
CameraPreview(widget.controller),
],
),
),
),
),
),
),
)
);
}
#override
void dispose() {
super.dispose();
}
}
You can wrap your widget with scaffold and can add float button inside the scaffold like below :
#override
Widget build(BuildContext context) {
final size = MediaQuery.of(context).size.width;
return Scaffold(
floatingActionButton: FloatingActionButton(onPressed: (){},),
body: ShaderMask(
shaderCallback: (rect) {
return const LinearGradient(
begin: Alignment.topCenter,
end: Alignment.center,
colors: [Colors.black, Colors.transparent])
.createShader(Rect.fr
///// your code ///////
Im trying to create a card or Container with borderRadius to change its top side shape like a plane Knob but i cannot make it im attaching a picture so please if any one know how to create this in flutter help me thanks
Shape:
You can play with CliPPath, change the control point value to make it perfect.
class Test extends StatefulWidget {
const Test({super.key});
#override
State<Test> createState() => _TestState();
}
class _TestState extends State<Test> {
#override
Widget build(BuildContext context) {
return Scaffold(
backgroundColor: Colors.green,
body: LayoutBuilder(
builder: (p0, constaints) {
final width = constaints.maxWidth;
final double viewWidth = width * .8;
return Center(
child: SingleChildScrollView(
child: SizedBox(
width: viewWidth,
child: Column(
crossAxisAlignment: CrossAxisAlignment.center,
children: [
//top Curve
ClipPath(
clipper: CurvePath(),
child: Container(
width: viewWidth,
height: viewWidth,
color: Colors.white,
),
),
Container(
width: viewWidth,
height: 1200,
color: Colors.white,
)
],
),
),
),
);
},
),
);
}
}
class CurvePath extends CustomClipper<Path> {
#override
Path getClip(Size size) {
return Path()
..moveTo(0, size.height)
..quadraticBezierTo(20, 0, size.width / 2, 0)
..quadraticBezierTo(size.width, 0, size.width, size.height)
..lineTo(0, size.height);
}
#override
bool shouldReclip(covariant CustomClipper<Path> oldClipper) {
return false;
}
}
Also shapeBorder may help.
Using stroke method, how to create gradient line with sharp end in flutter? I want to draw the line as below in flutter.
Use CustomPainter to draw:
import 'package:flutter/material.dart';
void main() => runApp(Example());
class Example extends StatefulWidget {
#override
_ExampleState createState() => _ExampleState();
}
class _ExampleState extends State<Example> {
#override
void initState() {
super.initState();
}
#override
Widget build(BuildContext context) {
return MaterialApp(
home: Scaffold(
body: Center(
child: CustomPaint(
size: Size(200, 5),
painter: CurvePainter(),
),
)));
}
#override
void dispose() {
super.dispose();
}
}
class CurvePainter extends CustomPainter {
#override
void paint(Canvas canvas, Size size) {
var paint = Paint();
paint.color = Colors.black;
paint.style = PaintingStyle.fill; // Change this to fill
var path = Path();
path.moveTo(0, 0);
path.quadraticBezierTo(size.width / 2, size.height / 2, size.width, 0);
path.quadraticBezierTo(size.width / 2, -size.height / 2, 0, 0);
canvas.drawPath(path, paint);
}
#override
bool shouldRepaint(CustomPainter oldDelegate) {
return true;
}
}
modified sleepingkit answer:
import 'package:flutter/material.dart';
class PointedLinePainter extends CustomPainter {
final double width;
PointedLinePainter(this.width);
#override
void paint(Canvas canvas, Size size) {
var paint = Paint();
paint.color = Colors.white;
paint.style = PaintingStyle.fill;
var path = Path();
path.moveTo(0, 0);
path.quadraticBezierTo(width / 3, 0.5, width, 0);
path.quadraticBezierTo(width / 3, -0.5, 0, 0);
canvas.drawPath(path, paint);
}
#override
bool shouldRepaint(CustomPainter oldDelegate) {
return true;
}
}
somewhere in code:
Container(
margin: EdgeInsets.symmetric(horizontal: 10.0),
alignment: Alignment.centerLeft,
width: MediaQuery.of(context).size.width,
height: 2,
child: CustomPaint(
painter:
PointedLinePainter(width - 2 * horizontalPointedLineMargin),
),
)
Can't see your picture.You can use the CustomPaint widget to draw lines, define a class that extends CustomPainter, and use the canvas.drawLine() method.
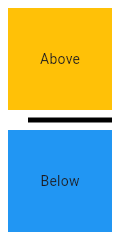
Divider class
A thin horizontal line, with padding on either side.
In the material design language, this represents a divider. Dividers can be used in lists, Drawers, and elsewhere to separate content.
To create a divider between ListTile items, consider using ListTile.divideTiles, which is optimized for this case.
The box's total height is controlled by height. The appropriate padding is automatically computed from the height.
[
import 'package:flutter/material.dart';
void main() => runApp(MyApp());
/// This Widget is the main application widget.
class MyApp extends StatelessWidget {
static const String _title = 'Flutter Code Sample';
#override
Widget build(BuildContext context) {
return MaterialApp(
title: _title,
home: Scaffold(
appBar: AppBar(title: const Text(_title)),
body: MyStatelessWidget(),
),
);
}
}
/// This is the stateless widget that the main application instantiates.
class MyStatelessWidget extends StatelessWidget {
MyStatelessWidget({Key key}) : super(key: key);
#override
Widget build(BuildContext context) {
return Center(
child: Column(
children: <Widget>\[
Expanded(
child: Container(
color: Colors.amber,
child: const Center(
child: Text('Above'),
),
),
),
const Divider(
color: Colors.black,
height: 20,
thickness: 5,
indent: 20,
endIndent: 0,
),
Expanded(
child: Container(
color: Colors.blue,
child: const Center(
child: Text('Below'),
),
),
),
\],
),
);
}
}]
Here info how to change style enter link description here
Row(
children: [
Expanded(
child: SizedBox(
height: 3,
child: Container(
decoration: BoxDecoration(
gradient: LinearGradient(
colors: [Colors.white, Colors.black],
begin: Alignment.centerRight,
end: Alignment.centerLeft
)
),
),
),
),
Expanded(
child: SizedBox(
height: 3,
child: Container(
decoration: BoxDecoration(
gradient: LinearGradient(
colors: [Colors.white, Colors.black],
begin: Alignment.centerLeft,
end: Alignment.centerRight
)
),
),
),
),
],
)
Closed. This question does not meet Stack Overflow guidelines. It is not currently accepting answers.
This question does not appear to be about programming within the scope defined in the help center.
Closed 2 years ago.
Improve this question
I am creating an app and I want to do a background like in this picture:
How can I do it by the easiest way ?
Here is my simple approach to draw grid lines
_drawGridLines({double space = 30, Color color = Colors.red, Widget child}) {
return LayoutBuilder(
builder: (BuildContext context, BoxConstraints constraints) {
double width = constraints.maxWidth;
double height = constraints.maxHeight;
var h = Container(width: 2, height: height, color: color);
var v = Container(width: width, height: 2, color: color);
return Stack(children: <Widget>[
...List.generate((width / space).round(), (index) => Positioned(left: index * space, child: h)),
...List.generate((height / space).round(), (index) => Positioned(top: index * space, child: v)),
if(child != null) child,
]);
},
);
}
Usage
class Test extends StatelessWidget {
#override
Widget build(BuildContext context) {
return SafeArea(
child: Scaffold(body: _drawGridLines()),
);
}
}
it use CustomPaint
For Example
class _MyHomePageState extends State<MyHomePage> {
int _counter = 0;
void _incrementCounter() {
getHttp();
//
}
#override
Widget build(BuildContext context) {
return Scaffold(
appBar: AppBar(
title: Text(widget.title),
),
body: CustomPaint(
painter: BacgroundPaint(),
child: Center(
child: Column(
mainAxisAlignment: MainAxisAlignment.center,
children: <Widget>[
Text(
'You have pushed the button this many times:',
),
Text(
'$_counter',
style: Theme.of(context).textTheme.headline4,
),
],
),
),
),
);
}
}
class BacgroundPaint extends CustomPainter {
#override
void paint(Canvas canvas, Size size) {
final height = size.height;
final width = size.width;
final paint = Paint();
Path mainBackground = Path();
mainBackground.addRect(Rect.fromLTRB(0, 0, width, height));
paint.color = Colors.teal;
final heightLine = height ~/ 20; // your Horizontal line
final widthLine = (width ~/ 10); // your Vertical line
for(int i = 1 ; i < height ; i++){
if(i % heightLine == 0){
Path linePath = Path();
linePath.addRect(Rect.fromLTRB(0, i.toDouble(), width, (i+2).toDouble()));
canvas.drawPath(linePath, paint);
}
}
for(int i = 1 ; i < width ; i++){
if(i % widthLine == 0){
Path linePath = Path();
linePath.addRect(Rect.fromLTRB(i.toDouble(), 0 , (i+2).toDouble(), height));
canvas.drawPath(linePath, paint);
}
}
}
#override
bool shouldRepaint(CustomPainter oldDelegate) {
return oldDelegate != this;
}
}
You can do it by creating a container in your material app like this:
Widget build(BuildContext context) {
return MaterialApp(
home: Container(
decoration: BoxDecoration(
image: DecorationImage(
image: AssetImage("path/image.format"), fit: BoxFit.cover)),
child: Scaffold(
backgroundColor: Colors.transparent,
),
),
),
);
}
Whatever you draw upon this layout should have a transparent backgroundColor else it will not be visible. Hope it works!
Actually I tried to implement a Timer. The custom painter turned out pretty good. But when I tried to put the custom painter in a row or Column it overflows. The custom paint is only displayed when I explicitly define the height and width of the container. Now I need to add a Timer String in a row with the custom paint but it doesn't work. The height and width of the container take the full size of the screen not allowing any other widget to display.
#override
Widget build(BuildContext context) {
double height = MediaQuery.of(context).size.height;
double width = MediaQuery.of(context).size.width;
return Scaffold(
backgroundColor: Styles.primaryDarkBlue,
body: SafeArea(
child: Container(
height: height,
width: width,
child: Padding(
padding: const EdgeInsets.all(8.0),
child: CustomPaint(
painter: TimerBar(
animation: animation,
)),
),
),
));
}
Here is the full code.
import 'package:flutter/material.dart';
import 'package:focus7/styles.dart';
class Timer extends StatefulWidget {
#override
_TimerState createState() => _TimerState();
}
class _TimerState extends State<Timer> with SingleTickerProviderStateMixin {
AnimationController controller;
Animation animation;
String get timerString {
Duration duration = controller.duration * controller.value;
return "${duration.inMinutes}:${(duration.inSeconds % 60).toString().padLeft(2, "0")}";
}
#override
void initState() {
super.initState();
controller = AnimationController(vsync: this, duration: Duration(seconds: 7));
animation = Tween<double>(begin: 0.1, end: 1).animate(controller);
controller.forward();
}
#override
Widget build(BuildContext context) {
double height = MediaQuery.of(context).size.height;
double width = MediaQuery.of(context).size.width;
print(height);
return Scaffold(
backgroundColor: Styles.primaryDarkBlue,
body: SafeArea(
child: Container(
height: height,
width: width,
child: Padding(
padding: const EdgeInsets.all(8.0),
child: CustomPaint(
painter: TimerBar(
animation: animation,
)),
),
),
));
}
}
class TimerBar extends CustomPainter {
final Gradient gradient = Styles.primaryGradient;
final Color timerBarColor = Styles.primaryBlue;
final Animation animation;
TimerBar({this.animation}) : super(repaint: animation);
#override
void paint(Canvas canvas, Size size) {
Paint paint = new Paint()
..color = timerBarColor
..strokeCap = StrokeCap.round
..style = PaintingStyle.stroke
..strokeWidth = 5;
Rect rect = new Rect.fromLTWH(0, 0, size.width, size.height / 25);
RRect rrectBorder = new RRect.fromRectAndRadius(rect, Radius.circular(50));
canvas.drawRRect(rrectBorder, paint);
paint.style = PaintingStyle.fill;
paint.strokeWidth = 0;
paint.shader = gradient.createShader(rect);
Rect rectAnim = new Rect.fromLTWH(0, 0, size.width * animation.value, size.height / 25);
RRect rrect = new RRect.fromRectAndRadius(rectAnim, Radius.circular(50));
canvas.drawRRect(rrect, paint);
}
#override
bool shouldRepaint(CustomPainter oldDelegate) {
// TODO: implement shouldRepaint
return false;
}
}
here is the output:
when I tried to nest in a row:
return Scaffold(
backgroundColor: Styles.primaryDarkBlue,
body: SafeArea(
child: Row(
children: <Widget>[
Container(
height: height,
width: width,
child: Padding(
padding: const EdgeInsets.all(8.0),
child: CustomPaint(
painter: TimerBar(
animation: animation,
)),
),
),
AnimatedBuilder(animation: controller, builder: (context, child) {
return Text(timerString,style: TextStyle(fontSize:24 ),);
})
],
),
));
This can be done with an Expanded widget, and by passing the width and height explicitly to the Timer() class.
I created this dartpad with the code so that you could run it (I had to change some of the styling to make it work):
http://dartpad.dev/eb69452a5c577d1a8286c6dd1a56e331
First, the Expanded widget I used in the Scaffold:
return Scaffold(
backgroundColor: Colors.yellow,
body: SafeArea(
child: Row(
children: <Widget>[
Expanded( // <----------------------------------
child: Padding(
padding: const EdgeInsets.all(8.0),
child: CustomPaint(
painter: TimerBar(
width: width,
height: height,
animation: animation,
),
),
),
),
AnimatedBuilder(
animation: controller,
builder: (context, child) {
return Text(
timerString,
style: TextStyle(fontSize: 24),
);
},
)
],
),
),
);
This worked, but the height and width of the timer bar wasn't sized according to the mediaquery, so I made explicit variables to pass into the class:
class TimerBar extends CustomPainter {
final Gradient gradient = LinearGradient(
begin: Alignment.topRight,
end: Alignment.bottomLeft,
colors: [Colors.blue, Colors.red]);
final Color timerBarColor = Colors.blue;
final Animation animation;
final width; // <----------------------------------
final height; // <----------------------------------
TimerBar({this.animation, this.width, this.height}) // <----------------
: super(repaint: animation);
...
and then I used those widths for your two rectangle objects:
Rect rect = new Rect.fromLTWH(0, 0, width, height / 25); // <-------------
RRect rrectBorder = new RRect.fromRectAndRadius(rect, Radius.circular(50));
canvas.drawRRect(rrectBorder, paint);
paint.style = PaintingStyle.fill;
paint.strokeWidth = 0;
paint.shader = gradient.createShader(rect);
Rect rectAnim =
new Rect.fromLTWH(0, 0, width * animation.value, height / 25); // <------------
RRect rrect = new RRect.fromRectAndRadius(rectAnim, Radius.circular(50));
I have found a solution after many trial and errors....The below code looks fine.
return Scaffold(
backgroundColor: Styles.primaryDarkBlue,
body: SafeArea(
child: Padding(
padding: const EdgeInsets.all(10),
child: Row(
crossAxisAlignment: CrossAxisAlignment.start,
children: <Widget>[
Expanded(
flex: 5,
child: Padding(
padding: const EdgeInsets.all(8.0),
child: AnimatedBuilder(
animation: controller,
builder: (context, child) {
return CustomPaint(painter: TimerBar(animation: animation, height: height));
}),
),
),
Expanded(
flex: 1,
child: Padding(
padding: const EdgeInsets.all(8.0),
child: AnimatedBuilder(
animation: controller,
builder: (context, child) {
return Text(
timerString,
style: TextStyle(fontSize: 24, color: Styles.primaryWhite),
);
}),
),
)
],
),
),
));
output: