I need to create a custom text-widget in the Flutter. I have to change any color it accepts in the style with an opacity of 0.7. If it does not have a style, I have to show the color from the default style with an opacity of 0.7 .
My problem is creating a new text widget with the feature I described.
There are multiple ways to approach this problem:
You can make a function based Widget or a class based Widget:
Function based Widget:
Widget myCustomText({required String data, Color? customColor}) {
return Opacity(
opacity: 0.7,
child: Text(
data,
style: TextStyle(
color: customColor ?? Colors.black,
),
),
);
}
Another approach is making a class based widget:
class MyCustomText extends StatelessWidget {
final String data;
final Color? customColor;
const MyCustomText({Key? key, required this.data, this.customColor})
: super(key: key);
#override
Widget build(BuildContext context) {
return Opacity(
opacity: 0.7,
child: Text(
data,
style: TextStyle(color: customColor ?? Colors.black),
),
);
}
}
Here's how you can implement your custom text wherever required:
// Code M:
class HomePage extends StatelessWidget {
const HomePage({Key? key}) : super(key: key);
#override
Widget build(BuildContext context) {
return Scaffold(
appBar: AppBar(),
body: Column(
mainAxisAlignment: MainAxisAlignment.center,
crossAxisAlignment: CrossAxisAlignment.center,
children: [
//Widget based Implementation
myCustomTextWidget(data: "Hello world"),
myCustomTextWidget(data: "Hello Peter", customColor: Colors.amber),
//Class based implementation
MyCustomTextClassWidget(data: "Hello Spidey"),
MyCustomTextClassWidget(data: "Hello 007", customColor: Colors.orange,)
],
),
);
}
}
Explanation: Null(??) operator checks if whether the value is given or not and if not given, then it will used default value after it.
Conclusion: Using Class based Widget i.e. Approach Number 2 is more robust and using class based widget is recommended by Flutter Official Team. It is also rebuild freindly and highly performant.
Output of the above code(M):
The working solution simply uses
ThemeData.primaryColor for the configuration of default text color;
If it does not have a TextStyle passes to CustomTextWidget, the default text color is used with an opacity of 0.7;
If it does have a TextStyle passes to CustomTextWidget, the textStyle is used with an opacity of 0.7.
Codes here:
import 'package:flutter/material.dart';
void main() => runApp(const MyApp());
class MyApp extends StatelessWidget {
const MyApp({Key? key}) : super(key: key);
static const String _title = 'Flutter Code Sample';
#override
Widget build(BuildContext context) {
return MaterialApp(
title: _title,
home: const HomeWidget(title: _title),
theme: ThemeData.light().copyWith(
// default text color
primaryColor: Colors.pink,
colorScheme: ColorScheme.fromSwatch().copyWith(
// change the appbar color
primary: Colors.green[800],
),
),
);
}
}
class HomeWidget extends StatelessWidget {
const HomeWidget({
Key? key,
required String title,
}) : _title = title,
super(key: key);
final String _title;
#override
Widget build(BuildContext context) {
return Scaffold(
appBar: AppBar(
title: Text(_title),
),
body: Column(
crossAxisAlignment: CrossAxisAlignment.start,
children: const [
CustomTextWidget(text: 'text does not have a style'),
CustomTextWidget(
text: 'text with passed black color style and fontSize 24',
textStyle: TextStyle(
fontSize: 24,
color: Colors.black
),
),
CustomTextWidget(
text: 'text with passed blue color style',
textStyle: TextStyle(
color: Colors.blue
),
),
],
),
);
}
}
class CustomTextWidget extends StatelessWidget {
final String text;
final TextStyle? textStyle;
const CustomTextWidget({Key? key, required this.text, this.textStyle}) : super(key: key);
#override
Widget build(BuildContext context) {
final TextStyle finalTextStyle = textStyle ?? const TextStyle();
final Color? finalColor = textStyle != null && textStyle!.color != null
? textStyle!.color
: Theme.of(context).primaryColor;
return Text(
text,
// it accepts in the style with an opacity of 0.7.
style: finalTextStyle.copyWith(color: finalColor!.withOpacity(0.7)),
);
}
}
Expected outcome:
I could have used the widget Opacity very easily, but due to the Flutter document for Opacity Widget (resource) and the high cost of re-rendering the child, it was not necessary.
The whole problem could be solved by DefaultTextStyle. You only need to pay attention to handling the context, which is documented in the code below.
Two modes are seen in the following code:
1- If TextStyle is not defined for your Text widget, it follows the default color at DefaultTextStyle.of.(context) or Theme and then manual Opacity value is also set.
2- If TextStyle is defined for your Text widget, it follows the defined color and its manual Opacity value is also set.
import 'package:flutter/material.dart';
const double OPACITY_VALUE = 0.7;
void main() {
runApp(const MyApp());
}
class MyApp extends StatelessWidget {
const MyApp({Key? key}) : super(key: key);
#override
Widget build(BuildContext context) {
return MaterialApp(
title: 'Flutter Demo',
theme: ThemeData(
primarySwatch: Colors.blue,
),
home: const HomeWidget(),
);
}
}
class HomeWidget extends StatelessWidget {
const HomeWidget({
Key? key,
}) : super(key: key);
#override
Widget build(BuildContext context) {
/// ATTENTION: parent of this context is Material App .
return Scaffold(
body: Center(
child: Builder(builder: (context2) {
/// context2 is important because referred to parent , and parent is Scaffold .
return Column(
mainAxisAlignment: MainAxisAlignment.center,
children: <Widget>[
/// color and textStyle of this text widget referred to current Theme or DefaultTextStyle .
Text(
'You have pushed the button this many times:',
style: DefaultTextStyle.of(context2).style.copyWith(
color: DefaultTextStyle.of(context2)
.style
.color!
.withOpacity(OPACITY_VALUE)),
),
const CustomizedTextWidget(color: Colors.purple),
],
);
}),
),
);
}
}
class CustomizedTextWidget extends StatelessWidget {
const CustomizedTextWidget({
Key? key,
required this.color,
}) : super(key: key);
final Color color;
#override
Widget build(BuildContext context) {
return Text(
'0',
style: TextStyle(color: color, fontSize: 32)
.copyWith(color: color.withOpacity(OPACITY_VALUE)),
);
}
}
Related
I would like to have a persistent container occupy the space about my material Scaffolds AppBar. I would like the Scaffold to resize to take up the available space.
When I try to do this, my Scaffold continues to be the height of the entire screen, and it is simply pushed lower, with a portion overflowing off the screen.
Is there a way I can have the Scaffold to resize to the available space?
Here is what I have coded so far...
void main() {
runApp(const MyApp());
}
class MyApp extends StatelessWidget {
const MyApp({Key? key}) : super(key: key);
#override
Widget build(BuildContext context) {
return MaterialApp(
theme: ThemeData(
primarySwatch: Colors.blue,
),
home: const MyHomePage(),
);
}
}
class MyHomePage extends StatefulWidget {
const MyHomePage({Key? key}) : super(key: key);
#override
State<MyHomePage> createState() => _MyHomePageState();
}
class _MyHomePageState extends State<MyHomePage> {
#override
Widget build(BuildContext context) {
return PersistenTopBar(
child: Scaffold(
appBar: AppBar(
title: const Text("Test App"),
),
body: Container(),
),
);
}
}
class PersistenTopBar extends StatelessWidget {
final Widget child;
const PersistenTopBar({Key? key , required this.child }) : super(key: key);
#override
Widget build(BuildContext context) {
var mediaQuery = MediaQuery.of(context);
return Column(
children: [
Container(
width: double.infinity,
height: 200,
color: Colors.red,
),
SizedBox(
width: mediaQuery.size.width,
height: mediaQuery.size.height,
child: child,
),
],
);
}
}
You could also create a CustomAppBar that would take as children a topChild and an appBar.
class CustomAppBar extends StatelessWidget implements PreferredSizeWidget {
final double height;
final Widget topChild;
final AppBar appBar;
const CustomAppBar(
{Key? key,
this.height = 200.0,
required this.topChild,
required this.appBar})
: super(key: key);
#override
Widget build(BuildContext context) {
return Column(
children: [
Expanded(child: topChild),
appBar,
],
);
}
#override
Size get preferredSize => Size.fromHeight(height);
}
Full code sample
import 'package:flutter/material.dart';
void main() {
runApp(const MyApp());
}
class MyApp extends StatelessWidget {
const MyApp({Key? key}) : super(key: key);
#override
Widget build(BuildContext context) {
return MaterialApp(
theme: ThemeData.light(),
home: const MyHomePage(),
);
}
}
class MyHomePage extends StatelessWidget {
const MyHomePage({Key? key}) : super(key: key);
#override
Widget build(BuildContext context) {
return Scaffold(
appBar: CustomAppBar(
topChild: Container(color: Colors.red),
appBar: AppBar(title: const Text('My awesome Test App')),
),
body: const Center(
child: Text(
"Test App",
style: TextStyle(fontSize: 32.0),
),
),
);
}
}
class CustomAppBar extends StatelessWidget implements PreferredSizeWidget {
final double height;
final Widget topChild;
final AppBar appBar;
const CustomAppBar(
{Key? key,
this.height = 200.0,
required this.topChild,
required this.appBar})
: super(key: key);
#override
Widget build(BuildContext context) {
return Column(
children: [
Expanded(child: topChild),
appBar,
],
);
}
#override
Size get preferredSize => Size.fromHeight(height);
}
the available space = mediaQuery.size.height - the Height of the Container above the appBar so the SizedBox under the appBar wil be :
SizedBox(
width: mediaQuery.size.width,
height: mediaQuery.size.height - 200,
child: child,
),
the result:
or you can wrap your SizedBox with Expanded Widget :
Expanded(
child: SizedBox(
width: mediaQuery.size.width,
child: child,
),
),
the same result :
I am trying to pass some color info from one widget to another but I am not able to get that color in destination widget. I wanted to build a single class with some UI code in it and just call this class in my main widget so that I don't have to repeat the code all over again, but I am not able to pass the data,
Here is the code that I am working on: What I am doing wrong?
void main(List<String> args) => runApp(const MyApp());
class MyApp extends StatelessWidget {
const MyApp({Key? key}) : super(key: key);
#override
Widget build(BuildContext context) {
return MaterialApp(
theme: ThemeData.dark(),
home: Scaffold(
appBar: AppBar(
title: const Text('Stateless/Clean Code'),
),
body: const StatelessOne(),
),
);
}
}
class StatelessOne extends StatelessWidget {
const StatelessOne({Key? key}) : super(key: key);
#override
Widget build(BuildContext context) {
return Center(
child: Column(
mainAxisAlignment: MainAxisAlignment.spaceEvenly,
children: [
const Text(
'Widget color can be customised without \nhaving to retype the entire code'),
StatelessTwo(key: key, param: Colors.green),
StatelessTwo(key: key, param: Colors.pink),
StatelessTwo(key: key, param: Colors.blue),
StatelessTwo(key: key, param: Colors.orange),
],
),
);
}
}
class StatelessTwo extends StatelessWidget {
StatelessTwo({Key? key, #required param}) : super(key: key);
final Map param = {};
#override
Widget build(BuildContext context) {
return Container(
height: 120,
width: 250,
color: param['color'],
child: Center(child: Text('Your Repetitive Widget $key')),
);
}
}
Simple way will be
class StatelessTwo extends StatelessWidget {
final Color color;
const StatelessTwo({
Key? key,
required this.color,
}) : super(key: key);
#override
Widget build(BuildContext context) {
return Container(
height: 120,
width: 250,
color: color,
child: Center(
child: Text('Your Repetitive Widget ${key ?? "no key found"}')),
);
}
}
-----
color: color, //use
Pass color
StatelessTwo(key: key, color: Colors.green), and seems you are passing same key, avoid it is not necessary for Ui-logic. Most likely, you don't need to pass key, if you still want to pass use UinqueKey()
I am trying to implement an app in flutter which will add multiple text watermark over the image. But using my code I am not getting exact result
Here is my code I have written
main.dart file
import 'package:flutter/material.dart';
import 'package:test_app1/watarmark.dart';
void main() {
runApp(MyApp());
}
class MyApp extends StatelessWidget {
// This widget is the root of your application.
#override
Widget build(BuildContext context) {
return MaterialApp(
title: 'Flutter Demo',
theme: ThemeData(
primarySwatch: Colors.blue,
visualDensity: VisualDensity.adaptivePlatformDensity,
),
home: MyHomePage(title: 'Flutter Demo Home Page'),
);
}
}
class MyHomePage extends StatefulWidget {
MyHomePage({Key key, this.title}) : super(key: key);
final String title;
#override
_MyHomePageState createState() => _MyHomePageState();
}
class _MyHomePageState extends State<MyHomePage> {
#override
initState() {
super.initState();
}
#override
Widget build(BuildContext context) {
return Scaffold(
appBar: AppBar(
// Here we take the value from the MyHomePage object that was created by
// the App.build method, and use it to set our appbar title.
title: Text(widget.title),
),
body: Center(
// Center is a layout widget. It takes a single child and positions it
// in the middle of the parent.
child: Card(
child: Container(
// width: double.infinity,
height: 250,
decoration: BoxDecoration(
image: DecorationImage(
image: AssetImage('assets/images/image.jpg'),
fit: BoxFit.fitWidth,
alignment: Alignment.topCenter,
),
),
child: Watarmark(
rowCount: 3,
columnCount: 9,
text: "My DigiShell",
),
clipBehavior: Clip.antiAlias,
),
),
),
);
}
}
And the watermark.dart page is as below
import 'dart:math';
import 'package:flutter/material.dart';
class Watarmark extends StatelessWidget {
final int rowCount;
final int columnCount;
final String text;
const Watarmark(
{Key key,
#required this.rowCount,
#required this.columnCount,
#required this.text})
: super(key: key);
#override
Widget build(BuildContext context) {
return IgnorePointer(
child: Container(
child: Column(
children: creatColumnWidgets(),
)),
);
}
List<Widget> creatRowWdiges() {
List<Widget> list = [];
for (var i = 0; i < rowCount; i++) {
final widget = Expanded(
child: Center(
child: Transform.rotate(
angle: - pi / 10,
child: Text(
text,
style: TextStyle(
color: Colors.blue, // Color(0x08000000),
fontSize: 14,
decoration: TextDecoration.none),
),
)));
list.add(widget);
}
return list;
}
List<Widget> creatColumnWidgets() {
List<Widget> list = [];
for (var i = 0; i < columnCount; i++) {
final widget = Expanded(
child: Row(
children: creatRowWdiges(),
));
list.add(widget);
}
return list;
}
}
Using the code I am getting the output like this
In the picture text is being overflowed from the image. I want the text just on the image only.
First I was trying to implement using Stack it was also overflowing, it was not clipped.
I will share the watermarked image taking a screenshot dynamically only on a widget
Here is the output of using stack
I have a simple flutter app that will switch theme on button pressed, while the overall theme is applied some that I had defined before doesn't seem to be applied in my widget, like when I define default color of Icon to green like this:
final ThemeData themeDark = ThemeData.dark().copyWith(
iconTheme: IconThemeData(
color: Colors.green,
),
);
when I use it in my floating action button icon it still uses the default IconTheme
class SwitchThemeButton extends StatelessWidget {
SwitchThemeButton({Key? key, required this.onPressed}) : super(key: key);
final VoidCallback onPressed;
#override
Widget build(BuildContext context) {
return FloatingActionButton(
child: Icon(
Icons.favorite,
// This won't work unless I manually assign it!
// color: IconTheme.of(context).color,
),
onPressed: onPressed,
);
}
}
Can somebody point it up where I'm doing it wrong? This is how the full code looks like by the way.
Full code:
import 'package:flutter/material.dart';
void main() {
runApp(MyApp());
}
final ThemeData themeDark = ThemeData.dark().copyWith(
iconTheme: IconThemeData(
color: Colors.green,
),
);
final ThemeData themeLight = ThemeData.light();
class MyApp extends StatefulWidget {
#override
MyAppState createState() => MyAppState();
}
class MyAppState extends State<MyApp> {
final _isDarkTheme = ValueNotifier<bool>(true);
#override
Widget build(BuildContext context) {
return ValueListenableBuilder<bool>(
valueListenable: _isDarkTheme,
builder: (context, bool isDark, _) => MaterialApp(
theme: themeLight,
darkTheme: themeDark,
themeMode: isDark ? ThemeMode.dark : ThemeMode.light,
home: Scaffold(
body: Stack(
children: [
Align(
alignment: Alignment.center,
child: MyWidget(),
),
Align(
alignment: Alignment.bottomRight,
child: SwitchThemeButton(onPressed: _switchTheme),
),
],
),
),
),
);
}
void _switchTheme() {
_isDarkTheme.value = !_isDarkTheme.value;
}
}
class MyWidget extends StatelessWidget {
#override
Widget build(BuildContext context) {
return Text('Make me green!', style: Theme.of(context).textTheme.headline4);
}
}
class SwitchThemeButton extends StatelessWidget {
SwitchThemeButton({Key? key, required this.onPressed}) : super(key: key);
final VoidCallback onPressed;
#override
Widget build(BuildContext context) {
return FloatingActionButton(
child: Icon(
Icons.favorite,
// color: IconTheme.of(context).color,
),
onPressed: onPressed,
);
}
}
i use this to change the icon color on floatButton
ThemeData lightTheme = ThemeData(
colorScheme: ThemeData().colorScheme.copyWith(
onSecondary : Colors.orange,
),);
The color of the Icon in theFloatingActionButton will be assigned based on Theme.of(context).accentColor.
Shortly, I need the selectable area to be smaller in terms of height.
Text and Checkbox sizes are good, but the surrounding box is too big for the checklist I'm trying to create.
CheckBoxListTile current height vs. desired height
Tried wrapping it with Transform.scale but text becomes too small:
Transform.scale(
scale: 0.8,
child: CheckboxListTile(
title: const Text("Rinite alérgica"),
value: timeDilation != 1.0,
controlAffinity: ListTileControlAffinity.leading,
onChanged: (bool value) {
setState(() {
timeDilation = value ? 2.0 : 1.0;
});
},
),
),
Tried wrapping it with Container, but I get on-screen overflow warnings.
Does anyone have a better solution?
When trying to resize the CheckboxListFile it seems that Google actually recommends creating a custom Tile widget and making use of the Checkbox widget.
https://api.flutter.dev/flutter/material/CheckboxListTile-class.html#material.CheckboxListTile.3
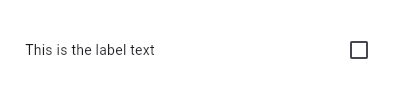
Look at the LabeledCheckbox widget that's been created. You can very easily modify all components to fit your needs. For example, if you wished to make the Widget itself smaller, you can now wrap it in a Container
/// Flutter code sample for CheckboxListTile
// 
//
// Here is an example of a custom LabeledCheckbox widget, but you can easily
// make your own configurable widget.
import 'package:flutter/material.dart';
void main() => runApp(const MyApp());
/// This is the main application widget.
class MyApp extends StatelessWidget {
const MyApp({Key? key}) : super(key: key);
static const String _title = 'Flutter Code Sample';
#override
Widget build(BuildContext context) {
return MaterialApp(
title: _title,
home: Scaffold(
appBar: AppBar(title: const Text(_title)),
body: const Center(
child: MyStatefulWidget(),
),
),
);
}
}
class LabeledCheckbox extends StatelessWidget {
const LabeledCheckbox({
Key key,
#required this.label,
#required this.padding,
#required this.value,
#required this.onChanged,
}) : super(key: key);
final String label;
final EdgeInsets padding;
final bool value;
final Function onChanged;
#override
Widget build(BuildContext context) {
return InkWell(
onTap: () {
onChanged(!value);
},
child: Container(
padding: padding,
child: Row(
children: <Widget>[
Expanded(child: Text(label)),
Checkbox(
value: value,
onChanged: (bool newValue) {
onChanged(newValue);
},
),
],
),
),
);
}
}
/// This is the stateful widget that the main application instantiates.
class MyStatefulWidget extends StatefulWidget {
const MyStatefulWidget({Key? key}) : super(key: key);
#override
State<MyStatefulWidget> createState() => _MyStatefulWidgetState();
}
/// This is the private State class that goes with MyStatefulWidget.
class _MyStatefulWidgetState extends State<MyStatefulWidget> {
bool _isSelected = false;
#override
Widget build(BuildContext context) {
return LabeledCheckbox(
label: 'This is the label text',
padding: const EdgeInsets.symmetric(horizontal: 20.0),
value: _isSelected,
onChanged: (bool newValue) {
setState(() {
_isSelected = newValue;
});
},
);
}
}
Have you tried ?
SizedBox(
height: 50,
width: 50,
child: ......
)